
Install Security Ninja
Install WP Security Ninja by navigating to ‘Plugins > Add New’ in WordPress, searching for ‘Security Ninja,’ and activating it. For manual installation, download the plugin, unpack the .zip file, and upload it.
Install WP Security Ninja by navigating to ‘Plugins > Add New’ in WordPress, searching for ‘Security Ninja,’ and activating it. For manual installation, download the plugin, unpack the .zip file, and upload it.
How to Use Security Ninja Tokens in MainWP Pro Reports Requirements Before you start, make sure your MainWP environment and child sites […]
Learn how to set up two-factor authentication (2FA) in Security Ninja with our step-by-step guide. Enhance your WordPress site’s security by enabling 2FA easily.
Welcome to Security Ninja! We’re thrilled to have you as part of our community. This guide will walk you through the installation […]
If you are a web developer who purchased the Security Ninja Pro plugin for a client, transferring billing to the client using Freemius is easy. Follow these steps to ensure a smooth transition.
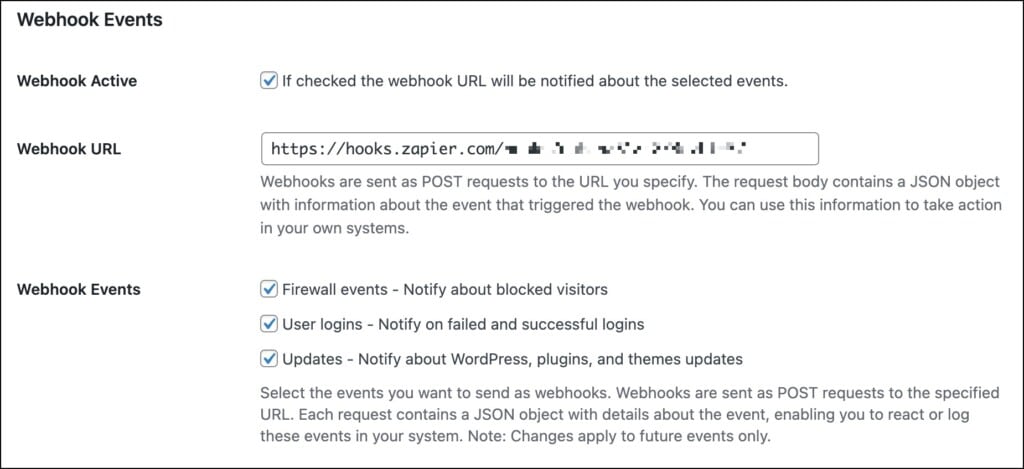
What Are Webhooks? Webhooks provide a powerful way to enable real-time notifications and integrations within applications. Essentially, a webhook is an automated […]
Enhancing Login Security with WP Security Ninja: “Check for Display of Unnecessary Information on Failed Login Attempts” WP Security Ninja offers a […]
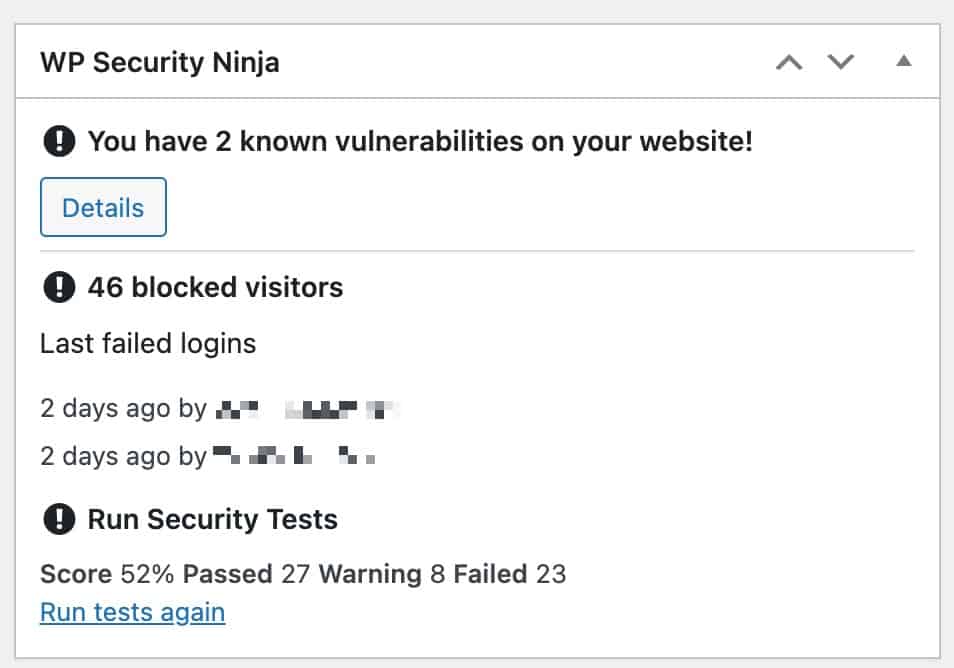
The Dashboard Widget is automatically added to the Dashboard when you first install the WP Security Ninja plugin. What is the Dashboard […]
![]()