Two-factor authentication (2FA) asks for a second step after the password, usually a code from an authenticator app or email. Security Ninja Pro adds 2FA under Security Ninja → Firewall.
Site-owner walkthrough: how to enable 2FA on WordPress. End-user steps: set up and use 2FA.
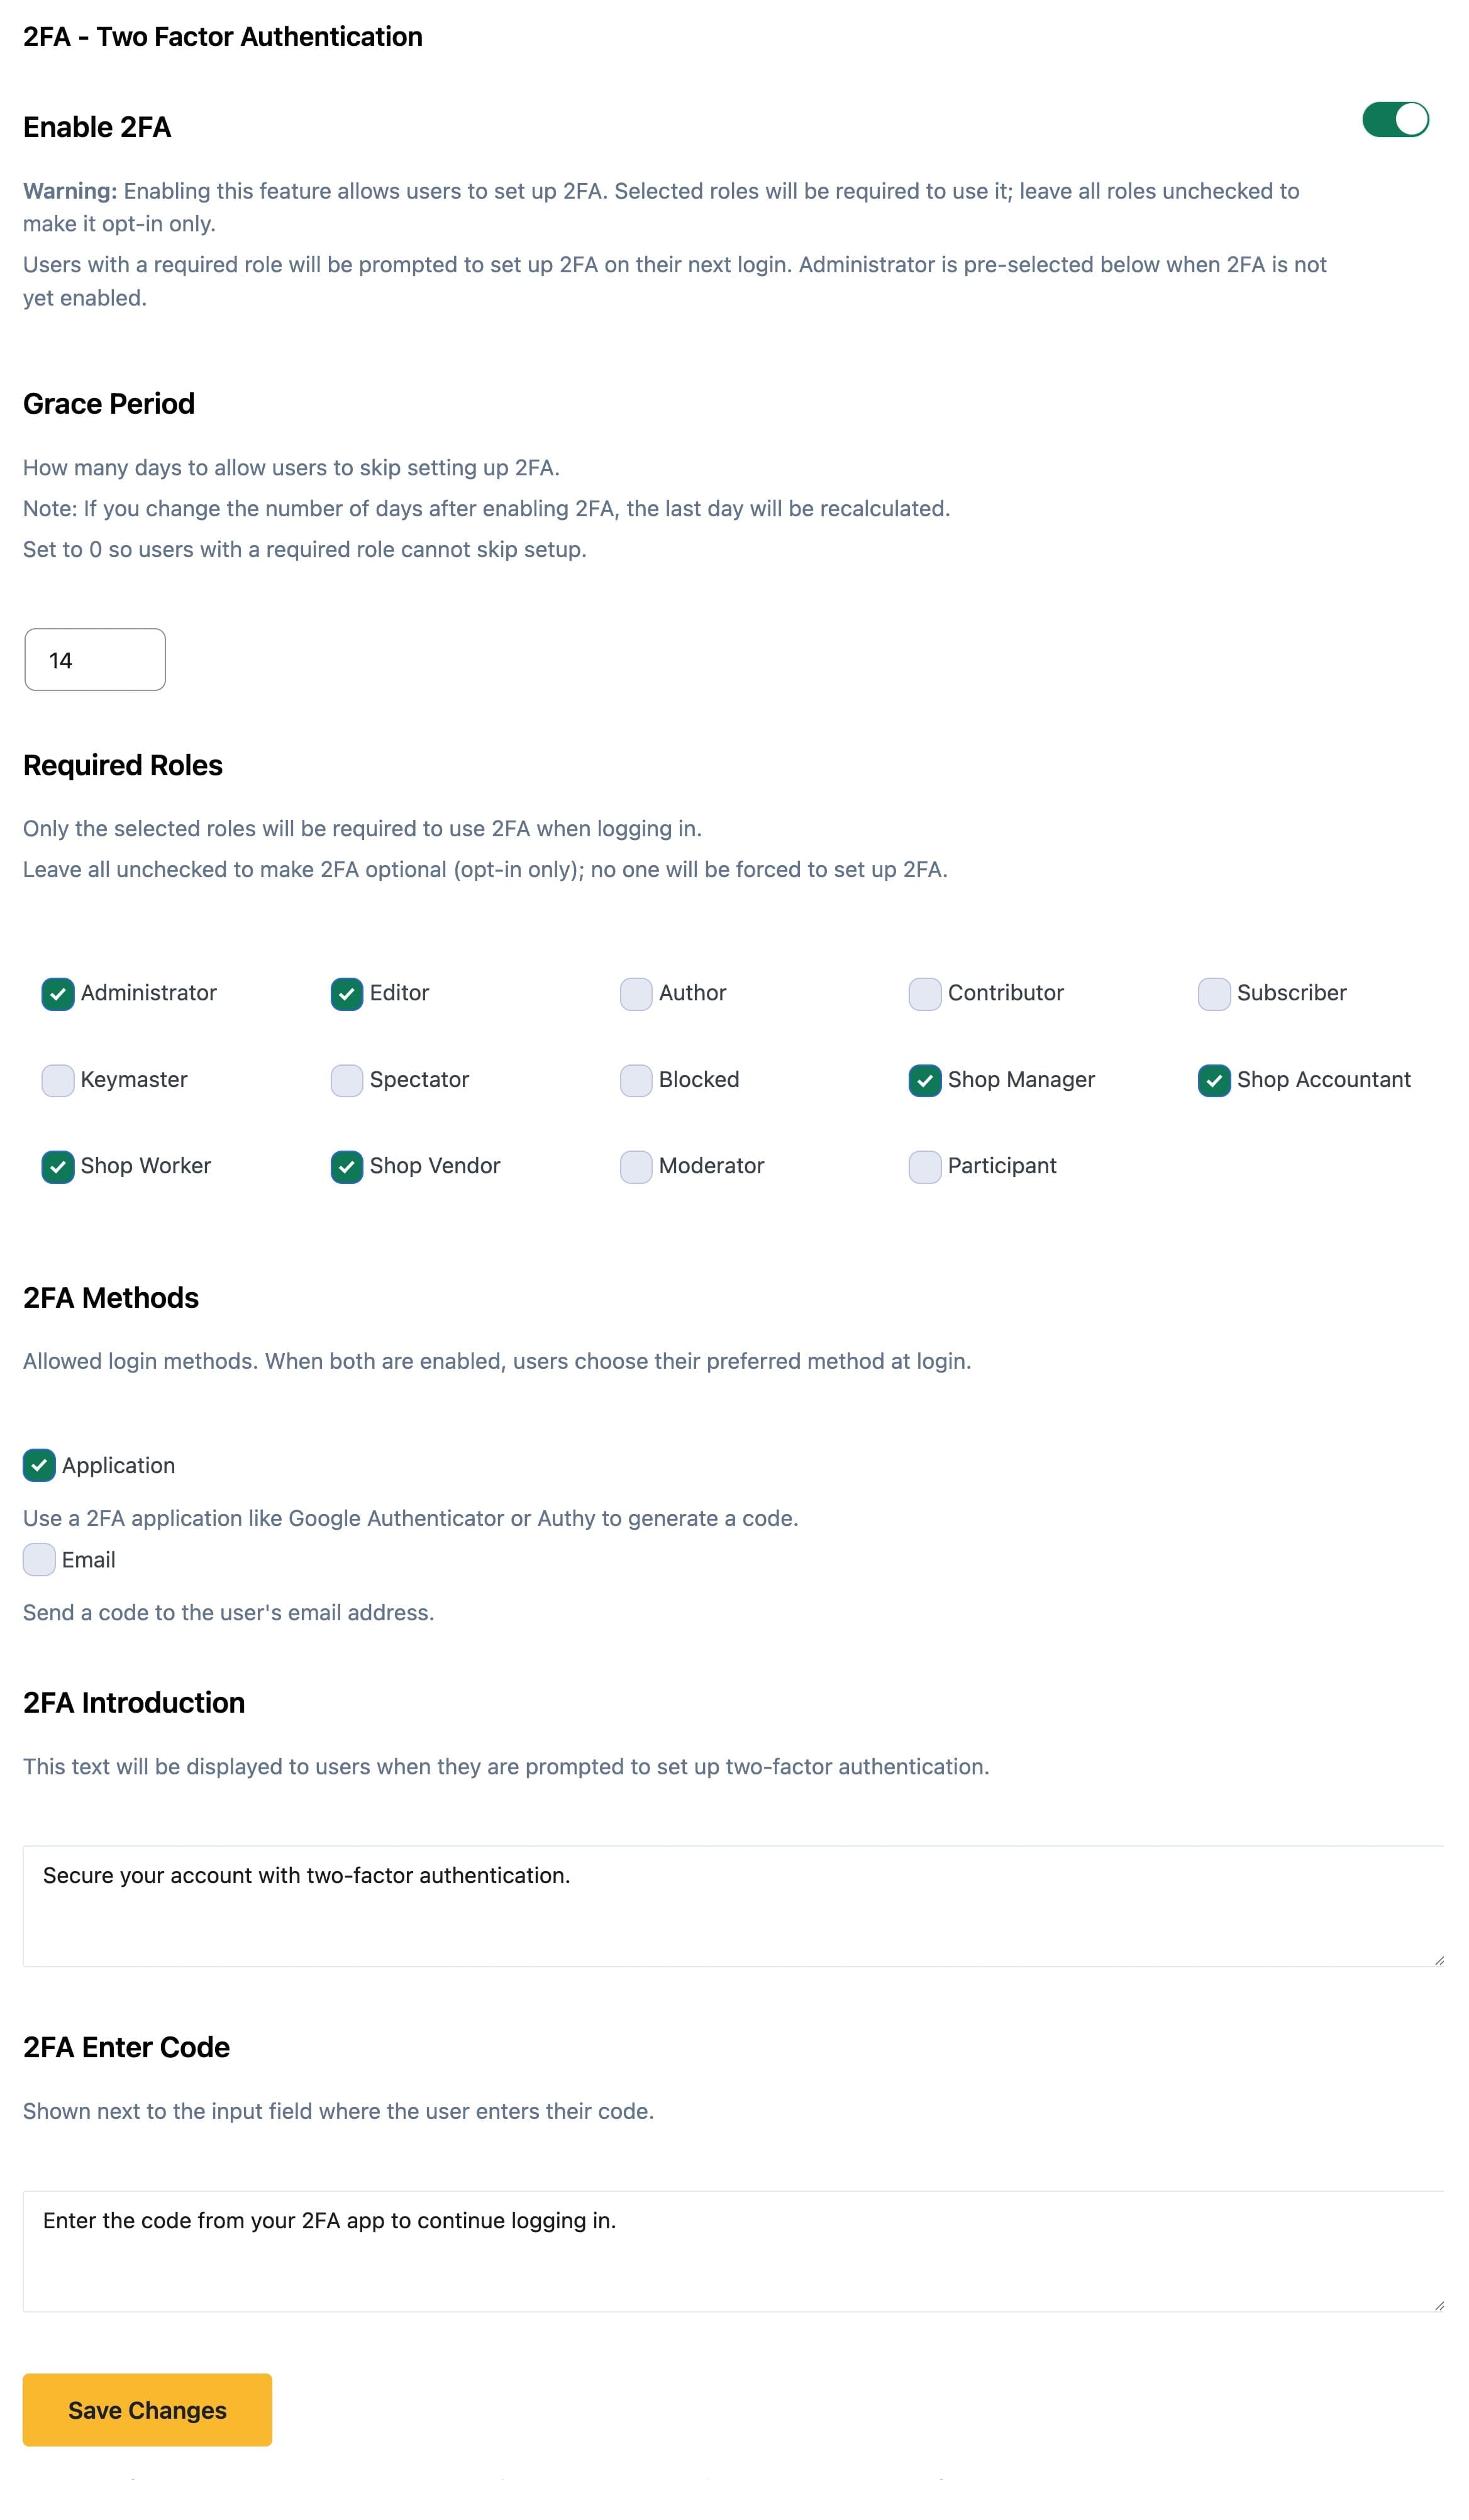
Settings
Enable 2FA
Turns the feature on. Selected roles must use 2FA. Leave all roles unchecked to make enrollment opt-in only.
When you enable it, users in a required role are prompted to set up 2FA (after any grace period).
Grace Period
Number of days a required-role user can skip setup. Default: 14. Set to 0 to require setup immediately. Changing the value after enable recalculates the last allowed day.
Required Roles
Only checked roles must use 2FA. The list matches roles on your site. Administrator is pre-selected when 2FA is not yet enabled. Leave all unchecked for opt-in only.
2FA Methods
- Authenticator app (time-based codes via QR or manual secret)
- Email codes
When both are enabled, the user picks a preferred method at login and that choice is remembered.
2FA Introduction
Text shown when a user is prompted to set up 2FA. Default: “Secure your account with two-factor authentication.”
2FA Enter Code
Text next to the code field at login. Default: “Enter the code from your 2FA app to continue logging in.”
Configure
- Go to Security Ninja → Firewall.
- Turn on Enable 2FA.
- Set grace period, required roles, methods, and login copy.
- Save settings.
- Confirm you can log in with a test account before requiring 2FA for all admins.
Save the secret access URL so you can recover if you lock yourself out.