This guide covers a full premium setup: plugins on the MainWP Dashboard, license activation, child sites with Security Ninja, then sync.
If you only need the free wordpress.org extension, use Install the free MainWP extension instead.
What you need
- A WordPress site running MainWP Dashboard
- At least one child site you manage with MainWP (you can add sites after installing the plugins)
- Security Ninja Premium (download from your account page)
- Security Ninja for MainWP Premium (the premium zip from your account or welcome email, not the free plugin from wordpress.org)
The free Security Ninja for MainWP build on wordpress.org does not include premium code. Agency, AppSumo, and paid addon customers must use the premium zip.
What goes where
- MainWP Dashboard
- MainWP Dashboard, Security Ninja Premium, and Security Ninja for MainWP Premium.
- Each child site
- Security Ninja only (free or Premium). Do not install the MainWP addon on child sites.
The addon runs only on your central MainWP Dashboard. Child sites already include the integration code inside Security Ninja.
Step 1: Install plugins on the MainWP Dashboard
- Log in to the WordPress site where MainWP Dashboard is installed.
- Go to Plugins → Add New → Upload Plugin.
- Upload and activate Security Ninja Premium. You do not need to configure features yet. The MainWP addon requires Security Ninja on the Dashboard.
- Upload and activate Security Ninja for MainWP Premium the same way.
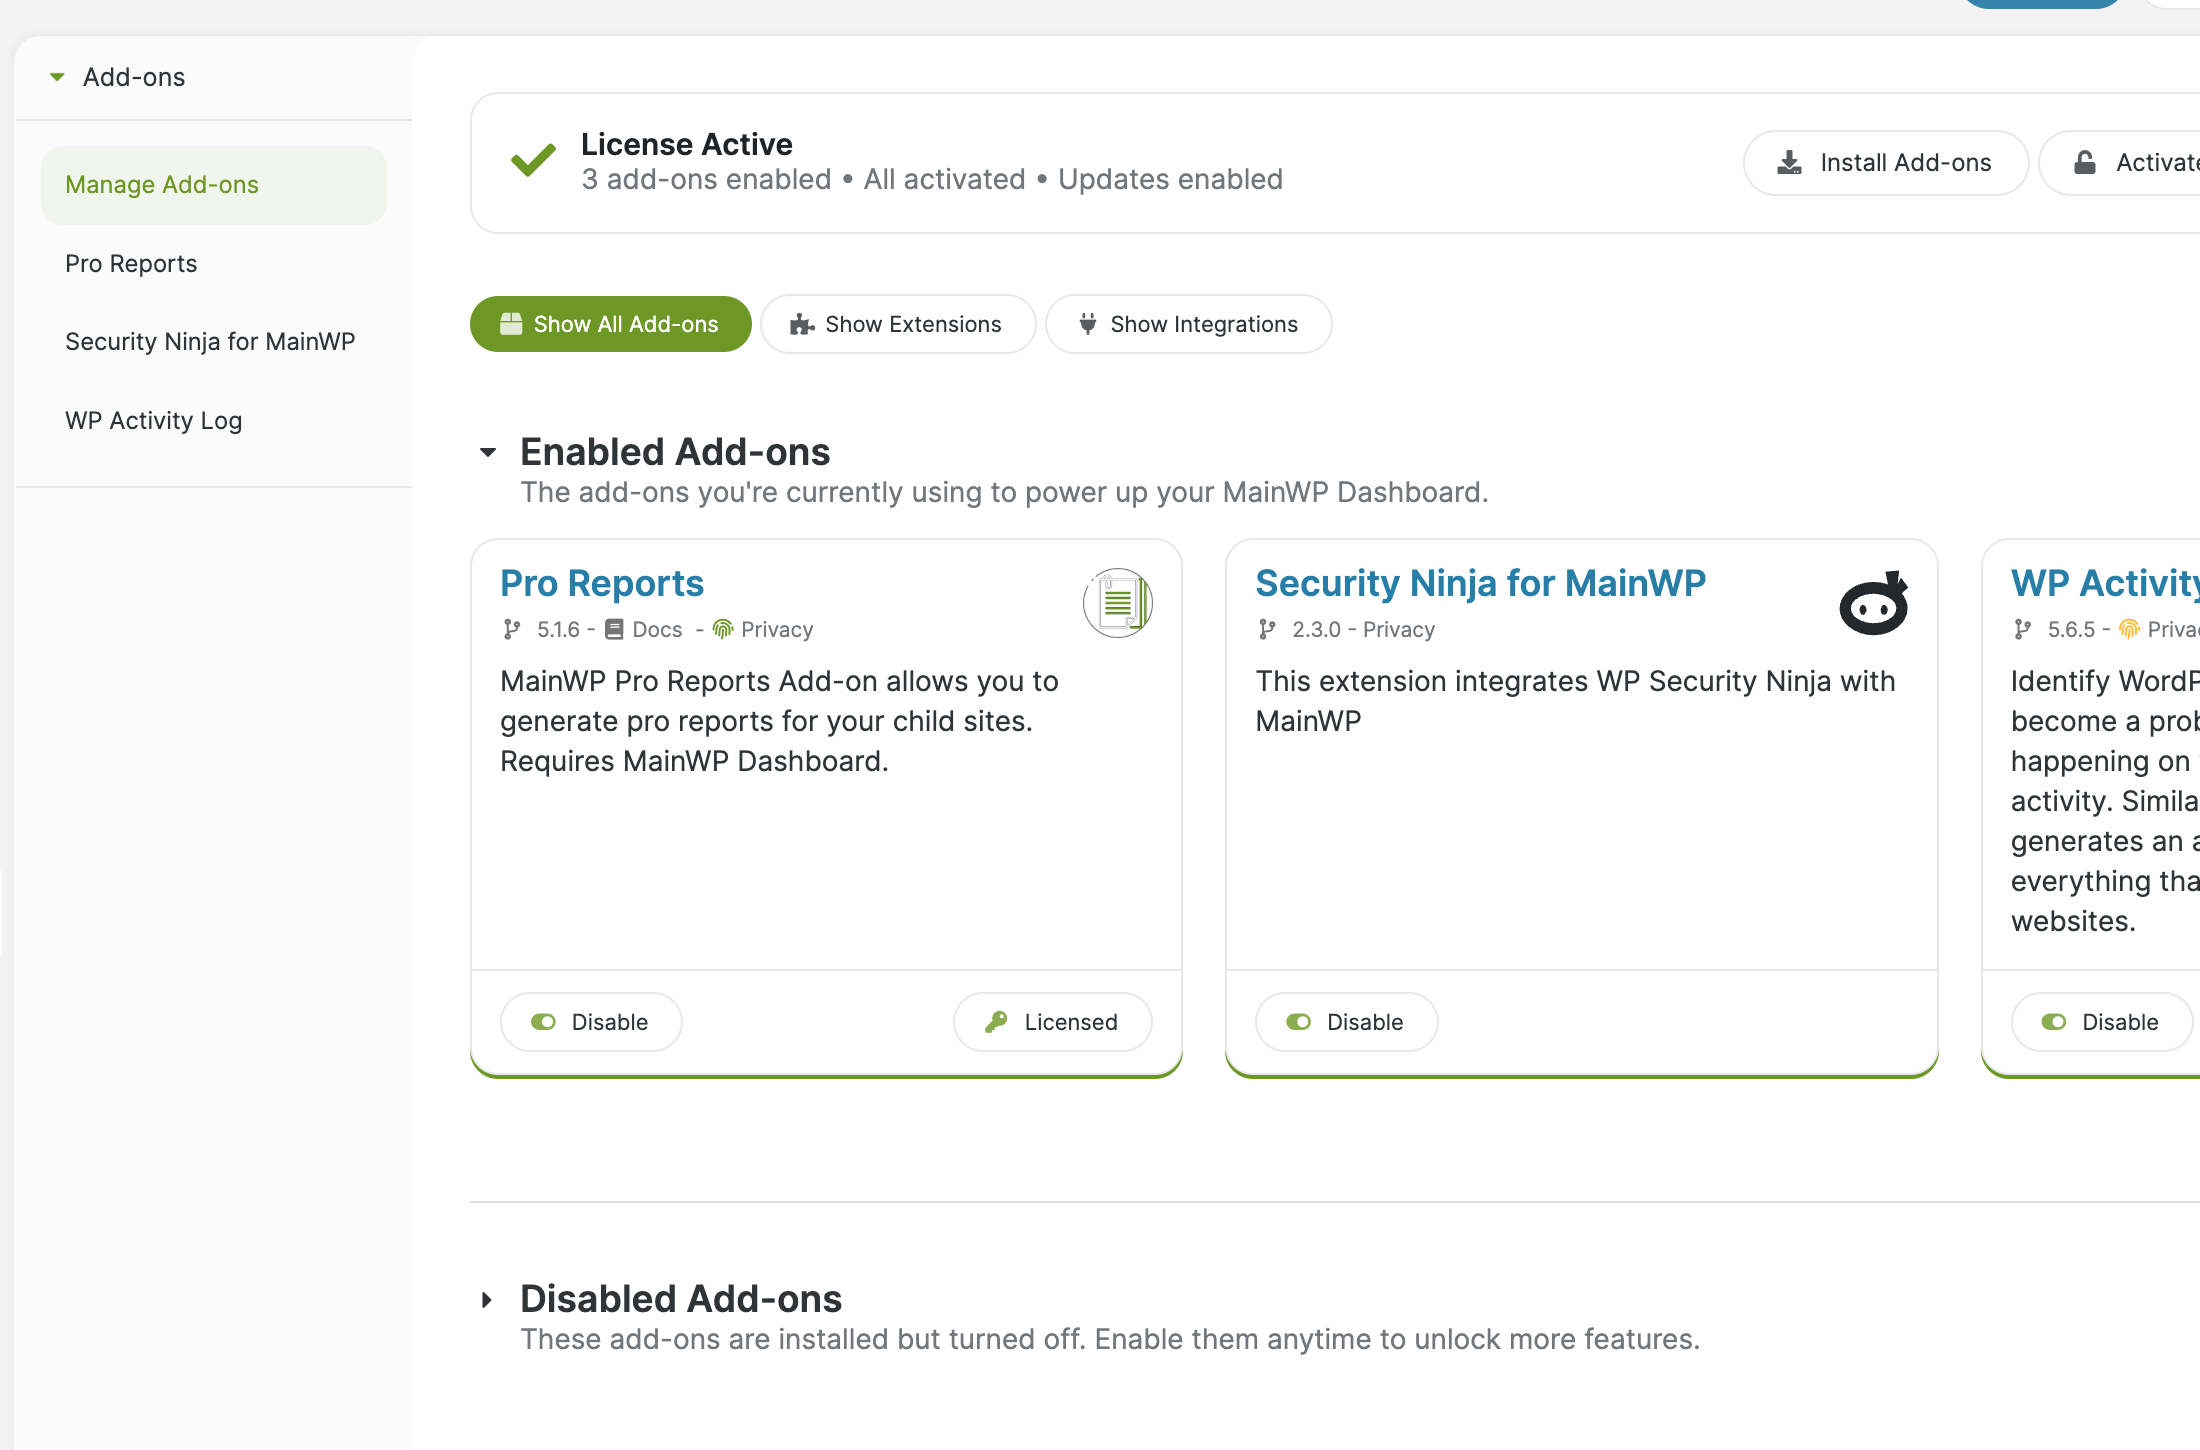
Step 2: Activate your license
The license key does not always open a popup after activation. That is normal.
Activate it in either place:
- On Plugins, find Security Ninja for MainWP and use the license activation link under the plugin name, or
- Open the extension Account / license area from MainWP (Extensions → Security Ninja for MainWP, or the Security Ninja item in the MainWP menu) and enter the key from your account email.
Use the license assigned to your MainWP Dashboard site. One MainWP addon license covers that central Dashboard, not every child site.
Step 3: Connect child sites and install Security Ninja
- In MainWP, add your websites under Sites so they show as connected child sites.
- On each child site, install and activate Security Ninja (free or Premium, matching what you need on that site).
- Do not install Security Ninja for MainWP on child sites.
Step 4: Sync
- In MainWP, open Sites → Manage Sites.
- Click Sync.
Until at least one child site is connected, Sync can stay grey and the Security Ninja overview can stay empty. That is expected. After sites are connected and Security Ninja is active on them, sync pulls scores, vulnerabilities, and events into the Dashboard.
What you should see next
After a successful sync:
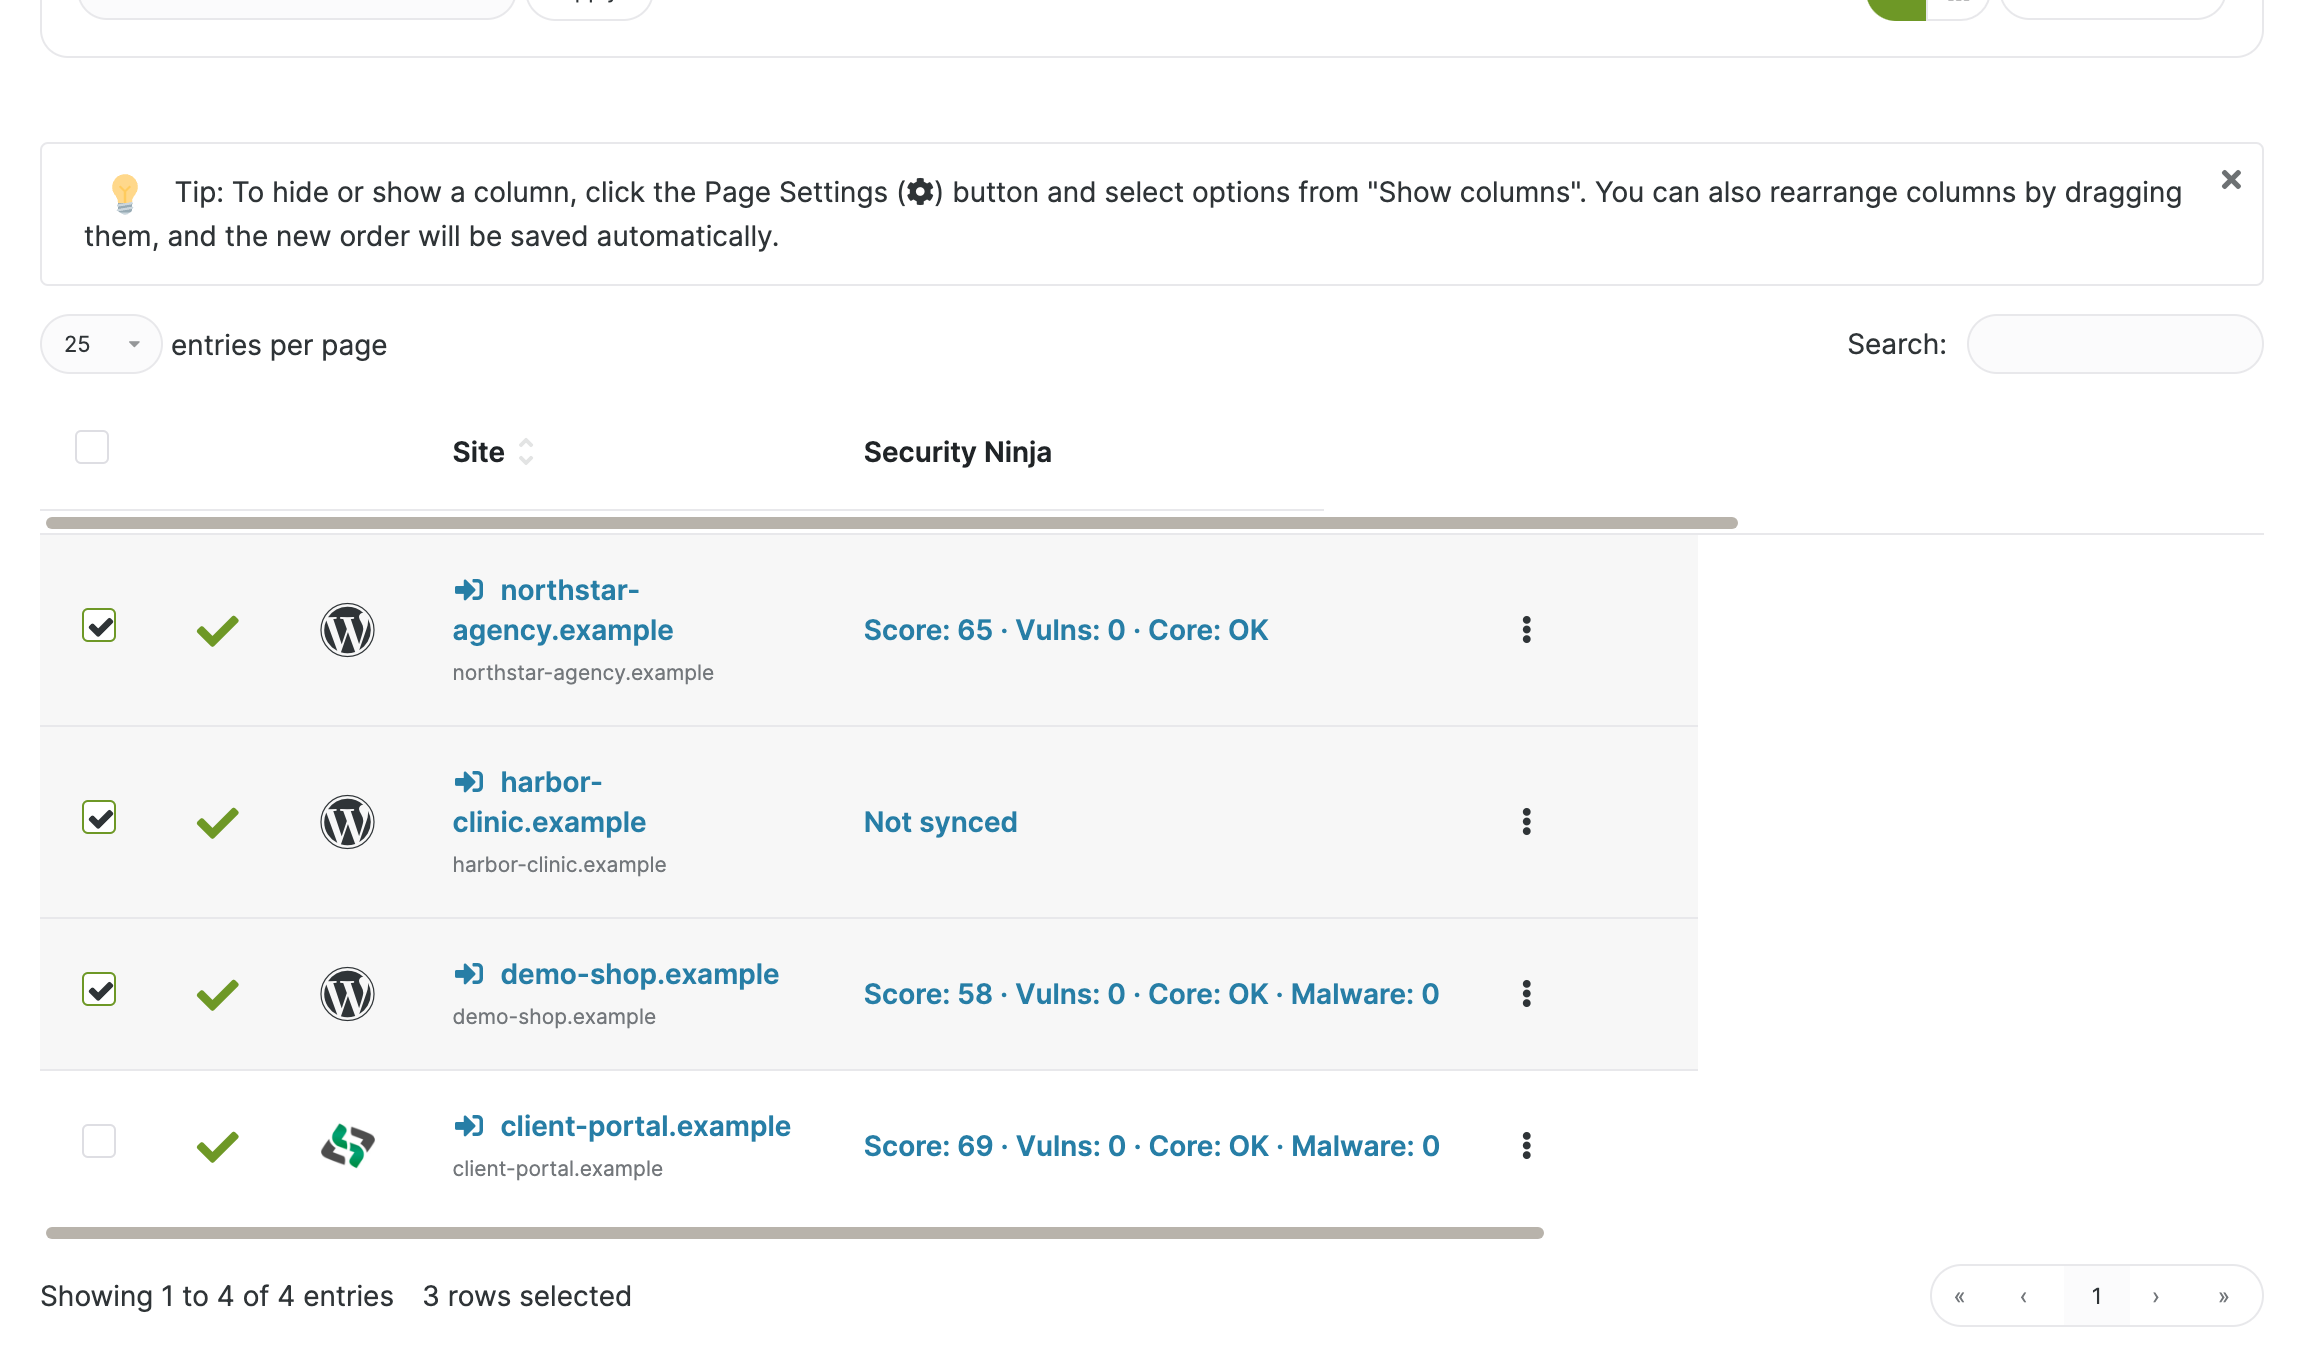
- A Security Ninja column on the MainWP Sites table (show or hide the column)
- Security Ninja in the MainWP left menu, and Extensions → Security Ninja for MainWP (how to open it)
- Bulk actions to run tests, copy settings, manage IPs, or refresh vulnerabilities (bulk actions, copy settings, manage IPs)
- With the premium addon, Overview, Events, and Settings tabs for fleet triage, synchronized events, alerts, and report metrics
Optional fleet email alerts are configured on the MainWP Dashboard Settings tab. They send a digest when selected fleet conditions change. They are separate from per-site webhooks.
To activate Security Ninja on many children at once, build a ZIP with license_key.txt and push it with MainWP’s plugin installer. The MainWP extension does not add a second installer for that.
Troubleshooting
- Empty Security Ninja dashboard or grey Sync: Confirm at least one child site is listed under MainWP Sites, Security Ninja is active on that child, then sync again.
- No license prompt: Use the license link under the plugin on the Plugins page, or the extension Account / license area.
- Missing column or data: Sync after installing the plugins. Check that the Security Ninja column is enabled in Sites table settings.
- Features look limited: Confirm you installed the premium Security Ninja for MainWP zip, not the free wordpress.org plugin.
- Activation issues: Confirm both Security Ninja Premium and the premium MainWP addon are active on the Dashboard.
More help
Suggest features or vote on ideas on our Product Lift page.
Need a hand? Email [email protected].