Install from WordPress admin (easiest)
- Go to Plugins → Add New.
- Search for Security Ninja.
- Install and activate the plugin.
Install manually via FTP
- Download the free zip from WordPress.org: https://downloads.wordpress.org/plugin/security-ninja.zip. For Pro, download the zip from your account page.
- Unpack the zip on your computer.
- Upload the
security-ninjafolder to/wp-content/plugins/. - In WordPress, go to Plugins and activate Security Ninja.
Need FTP help? See How to access your website via FTP.
Install via Upload Plugin
- Download the free or Pro zip to your computer.
- Go to Plugins → Add New → Upload Plugin.
- Choose the zip file and click Install Now.
- Activate Security Ninja.
Activate Pro
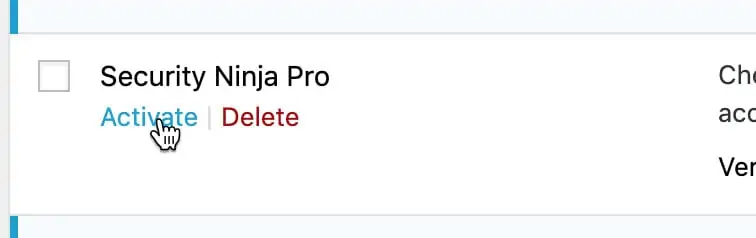
After you activate Pro, enter your license key when prompted.
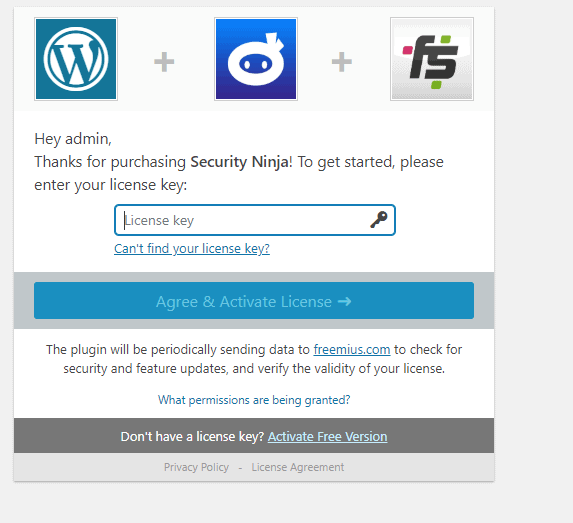
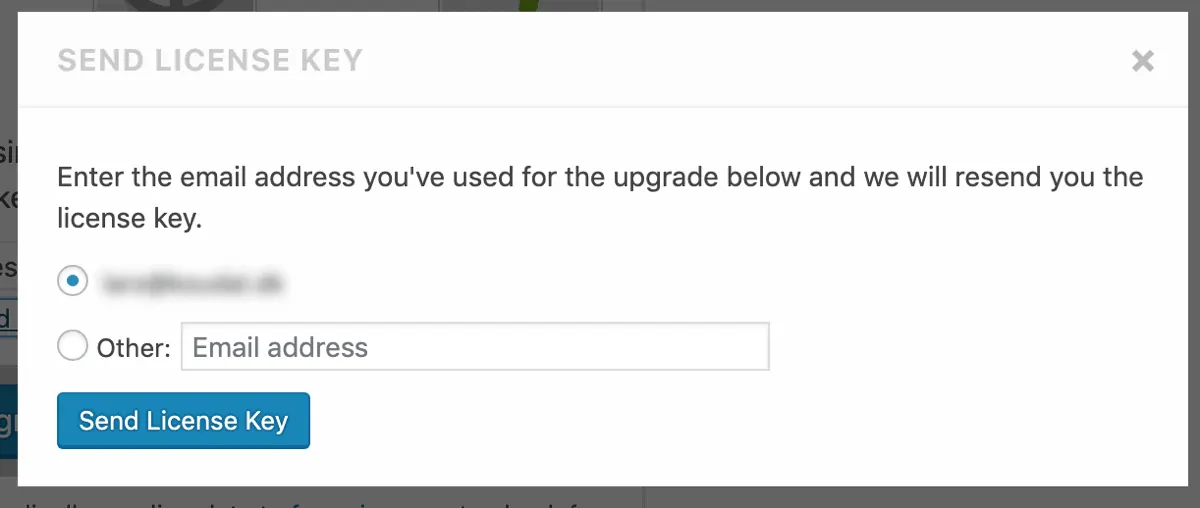
If you cannot find the key, check your purchase email, or use Can’t find your license key? under the license field. Enter the purchase email to have the key resent.
When the key validates, you land on the plugin pages. Run the Installation Wizard next if it does not open automatically.
Already on Free and upgrading
- Go to Security Ninja → Account.
- Click Activate License.
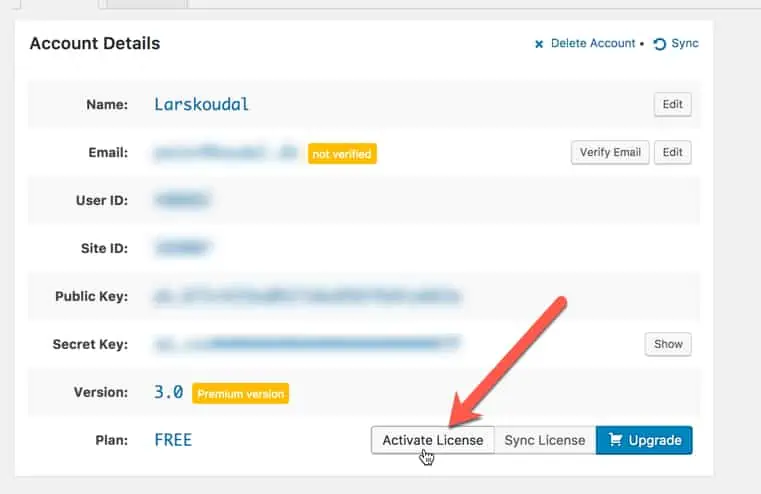
- Enter the Pro license key in the popup.
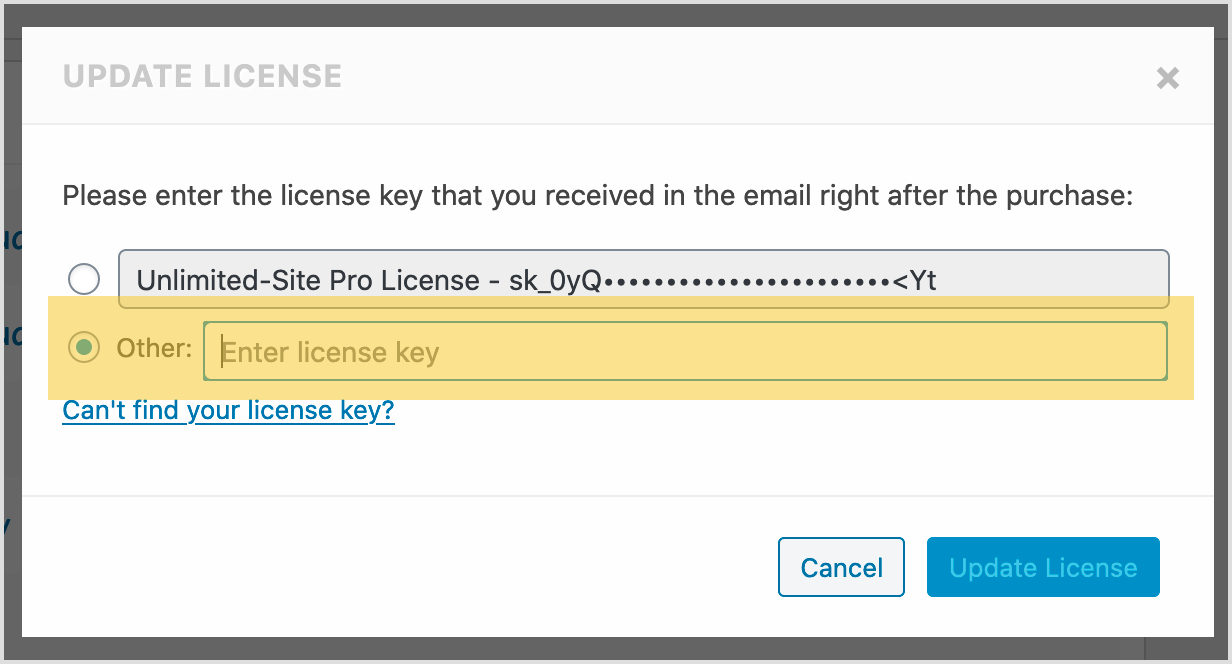
You can also download the latest Pro zip and manage billing from your account.
Older Gumroad licenses
If you bought Security Ninja before the current Freemius licensing system, the plugin may detect the old license and create a Freemius license for you.
If you still see the activation screen:
- Click Activate Free Version so a user exists in the licensing system.
- Contact support and ask for a license upgrade. Include your purchase email.
We need that free activation before we can attach a custom Pro license by hand.