If you’re looking to put your own branding on the WP Security Ninja plugin, you can achieve this with the White label tab. This powerful feature allows you to tailor the plugin to match your unique identity and brand requirements. Please note that Whitelabel functionality is exclusively available to Premium users with a license for 25 or more sites.
What Can You Customize with Whitelabel?
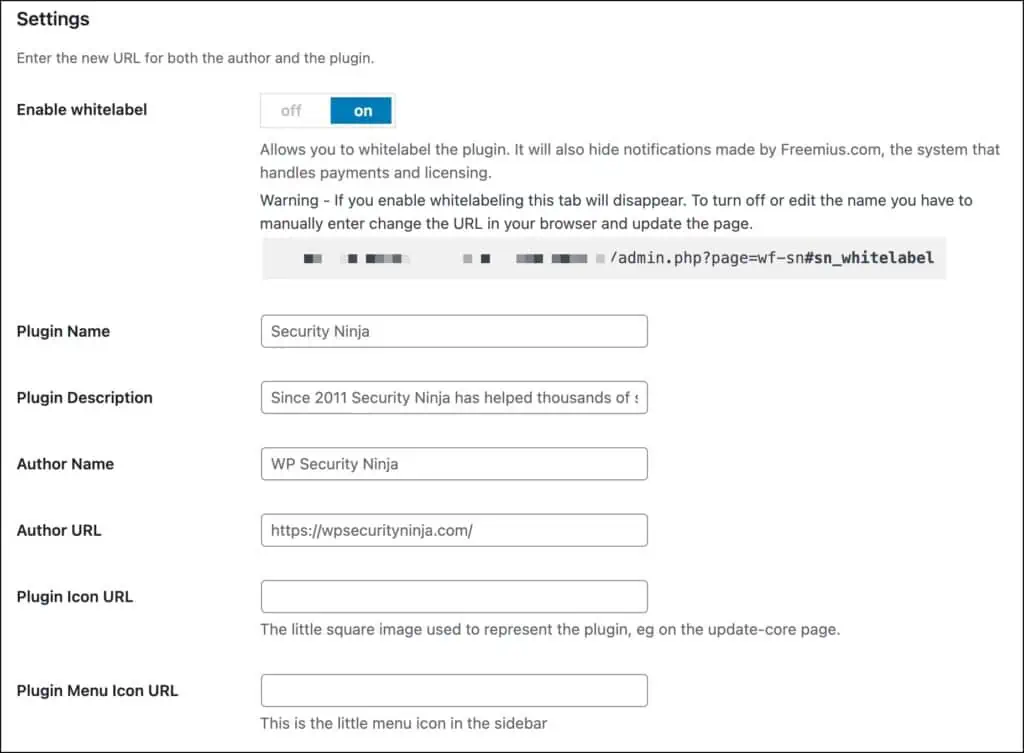
By enabling Whitelabel, you gain the ability to make the following customizations:
- Plugin Name: Change the name of the plugin to reflect your brand or specific needs.
- Plugin Description: Customize the plugin’s description to communicate your message effectively.
- Author Name: Replace the author’s name with your own or your organization’s name.
- Author URL: Set a custom URL that links to your website or any desired destination.
- Plugin Icon: Upload your own plugin icon to replace the default one.
- Change Description: Modify the plugin description to align with your branding and objectives.
Keep in mind that enabling Whitelabel removes all details related to WP Security Ninja and the website. This includes notifications, links to the account page, and all inline help links. You’ll be responsible for providing direct support to your users.
Enabling and Managing Whitelabel
Once Whitelabel is enabled, the tab is hidden from the regular plugin settings. To access the Whitelabel tab for making changes or disabling the feature, follow these steps:
- Log in to your WordPress admin dashboard.
- Access the plugin settings by going to:
https://yourwebsite.com/wp-admin/admin.php?page=wf-sn**#sn_whitelabel** - You’ll now have full access to the Whitelabel tab to make adjustments as needed.
With these steps, you can fully customize the WP Security Ninja plugin to align with your brand and provide a seamless experience for your users.