This article explains how to transfer a site and its WP Security Ninja license from one account to another. This might be necessary if you’re selling a website, changing ownership, or consolidating accounts.
Prerequisites
- You must have access to both the source account (the account currently associated with the site) and the destination account (the account you want to transfer the site to).
- Ensure that WP Security Ninja is installed and activated on the site you wish to transfer.
Method 1: Transferring Ownership via the Account Page
This method allows you to directly transfer the site to another user’s account through the WP Security Ninja plugin interface.
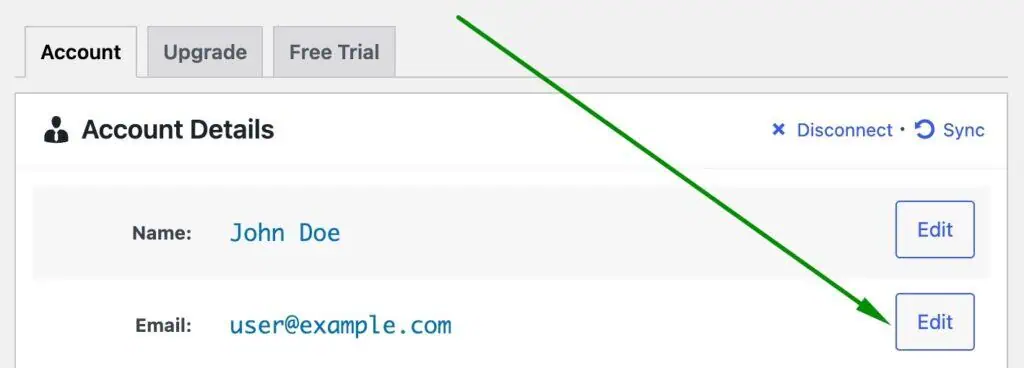
- Navigate to the Account Page:
- On the site you wish to transfer (e.g.,
example.com), go to the WP Security Ninja plugin’s Account page within your WordPress dashboard.

- On the site you wish to transfer (e.g.,
- Initiate Ownership Switch:
- Locate the email address row on the Account page.
- Click the “Edit” button next to the email address.
- Enter the email address of the new owner (the email address associated with their WP Security Ninja account).
- Complete the Ownership Switch Process:
- Follow the on-screen instructions to initiate the ownership transfer.
- Confirmation Emails:
- Both the current owner and the new owner will receive confirmation emails.
- Important: For security reasons, both parties must confirm the ownership transfer.
- Confirmation Timeframe:
- The current owner must confirm the ownership switch within four hours of receiving the email.
- After the current owner confirms, the new owner will receive a confirmation email that they need to accept within 24 hours.
- Site Transfer Complete:
- Once both parties have confirmed, the site will no longer be associated with your account and will be linked to the new owner’s account.
- Repeat for Other Sites:
- Repeat these steps for any other sites you need to transfer to a new owner.
Method 2: Disconnecting and Re-Activating
This method involves disconnecting the site from your account and allowing the new owner to activate it with their own license.
- Navigate to the Account Page:
- On the site you wish to transfer (e.g.,
example.com), go to the WP Security Ninja plugin’s Account page within your WordPress dashboard.
- On the site you wish to transfer (e.g.,
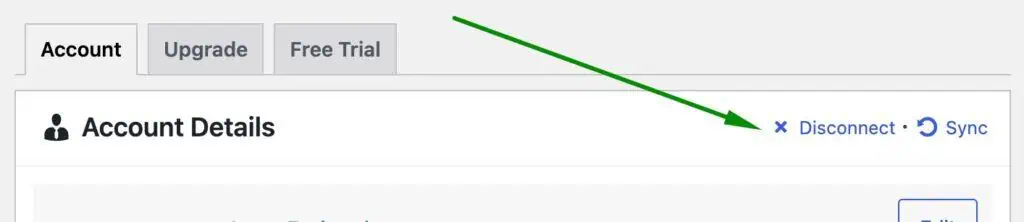
- Deactivate License (If Activated):
- If the site is currently activated with a license you want to deactivate, click the “Deactivate License” link.

- If the site is currently activated with a license you want to deactivate, click the “Deactivate License” link.
- Disconnect the Site:
- After deactivating the license (or if the license was already inactive), you will see a “Disconnect” link. Click it.

- This will remove the site from your account.
- After deactivating the license (or if the license was already inactive), you will see a “Disconnect” link. Click it.
- Redirected to Activation Page:
- You will be redirected to the activation page, which requires a license key.
- New Owner Activation:
- Instead of completing the activation yourself, allow the new owner to complete it on their end.
- When they activate their license, the installation (site) will be linked to their account.
- Repeat for Other Sites:
- Repeat these steps for any other sites you need to transfer to a new owner.

Written by Lars Koudal
Get AI-Powered Security Summary
Let AI analyze this WordPress security article and provide actionable insights from WP Security Ninja experts.
Trusted WordPress Security Expert