On Pro child sites, you can enable or disable Security Ninja white label from the MainWP Dashboard without opening each site’s wp-admin. Requires Security Ninja 5.190+ on children and Security Ninja for MainWP 2.0.7+ on the Dashboard.
Bulk white label action
- In MainWP, open Sites → Manage Sites.
- Select the child sites to update.
- In bulk actions, choose White Label (Security Ninja).
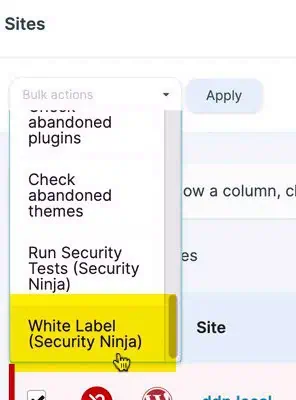
- In the popup:
- Choose enable or disable.
- If enabling, fill the required fields: Plugin Name, Plugin Description, Author Name, Author URL.
- Optionally set Plugin Icon URL and Plugin Menu Icon URL.
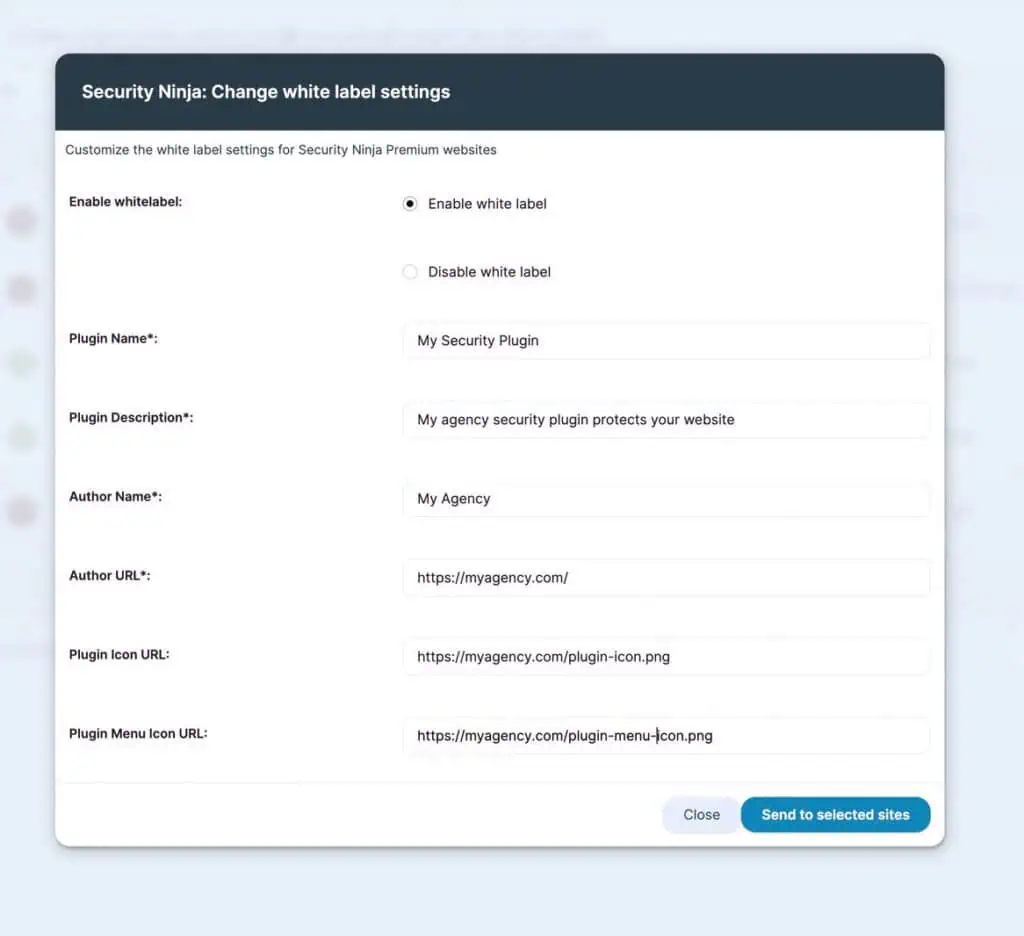
- Click Save to apply to the selected sites.
- Run MainWP Sync if the Dashboard still shows old branding state.
Open white label on a child site
If the menu is renamed after white label, open white label settings with:
https://yourwebsite.com/wp-admin/admin.php?page=wf-sn#sn_whitelabel
Replace yourwebsite.com with the child site domain.
More detail: How to whitelabel the plugin.
Related: Bulk actions in MainWP.